

Wool fiber after it came out of the oven.
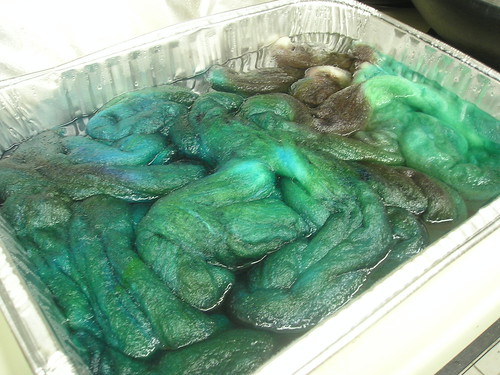
Yet more post-oven wool.
My motivation to finally get out the dyes again was the need to make another contribution to the Phat Fiber Sampler Box. June's theme is "A Midsummer Night's Dream," and this is how my Puck-inspired fiber came out:

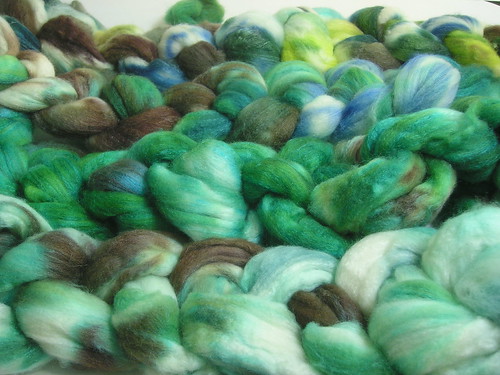
It's still waiting to get carded with the sparkly fibers I just received from Blue Mountain Handcrafts, for a more properly fairy-ish feel. ;) What happens after that is actually a bit of a mystery even to me right now; it's going to depend on how many batts I end up with in the end, probably. I'm pretty sure I'm spinning some of it, but I might actually put some in the shop in fiber form ... which would be the first time I've ever put batts in the shop — actually, it'd be the first time I've ever put any form of spinning fiber in the shop. Weird, huh? But I could just end up spinning all of it and putting it in the shop in yarn form. We'll see.
In case you want to know about my dyeing method, I present...
The Quicksilver Crafter Oven-Dyeing Method
...as of May 2010. ;)
This is just how I did it this time — you can obviously make your own tweaks based on what you have handy or your own preferences. And, of course, the general conensus among dyers is to not re-use dyeing supplies with food. I just went and bought some cheap stuff to use only for dyeing.
Materials needed:
- wash tub(s) (or you can use baking pans) — to pre-soak fiber before dyeing AND to rinse fiber after dyeing
- aluminum baking pan(s) — to dye the fiber in
- acid dyes (I used Jacquard)
- white vinegar — acid for the acid dyes
- aluminum foil — to cover the baking pans while they bake
- plastic cups — to mix dyes in
- face mask — to prevent accidental inhalation of dye powder
- ...and of course you need fiber or yarn to dye, and an oven ;)
- Soak fiber/yarn in tubs of water with a little vinegar for 1/2 hr to 1 hr.
- Put on mask. Mix dyes in cups to desired colors, following directions on the type of dye you're using. I put a splash of vinegar into each cup because I didn't put any new water into the baking pans with the fiber and didn't know how much vinegar was still in the fiber. (I was pretty lazy and mixed my dyes right before I poured them onto the fiber, and reused the same two cups to do it. You can also pre-mix each color in a different cup or glass jar or what have you.) You can take the mask off after you're done mixing.
- Preheat oven to 300 degrees F.
- Gently squeeze most of the water out of the fiber and place fiber into baking pans, trying to keep it in a single layer. There will be some water in the baking pans. This is good.
- Pour dye on the fiber in the baking pans. You can do it in a pattern or randomly; I was pretty random, and just tried to make large sections of color rather than small splotches, since I knew I was going to card the fiber afterward and wanted some fairly solid areas of color.
- Put aluminum foil over top of baking pans. Press foil in place to seal around the edges, which will prevent steam from escaping. This keeps the heat sealed into the pans, where it can set the dye, and also prevents the water from evaporating and leaving you with dry fiber. It's probably nice to keep the dye steam inside the pans rather than floating around the oven, too, at a guess. ;)
- Put baking pans carefully into oven. Bake for 1 hr.
- Let pans cool until they're comfortable to touch before lifting foil or removing fiber from pans.
- Fill tubs with cool water (or water the temperature of your fiber, if you're impatient and didn't wait for the fiber to cool completely) and gently place fiber into tubs to soak for 15 minutes or so. (This is indeed the "rinse" stage even though it feels a little passive for that particular verb. ;)) Lift fiber out of tub and gently squeeze the water out of it. Dump rinse water and repeat rinse step until used rinse water is clear.
- Let fiber dry. Pet. Admire. Use fiber. Be happy. :D