Simple Cup Cozy - Bottom Up Version
Design and pattern by Crystal Calhoun
A Star & Crossbones Knitting Pattern
This pattern is extremely adaptable to whatever yarn and needles you have, and to whatever cup you need to cover. Use whatever yarn and needle combo makes a fabric that you like; you could even use this project as a stashbuster, or to practice knitting in the round — whatever! It'll come out fine in the end, and if it doesn't, you can rip it out and start over without feeling too bad — it's a tiny project, after all. ;)
As you may have guessed from the name, I intend on knitting a top-down version of this cozy in a commercial yarn, which should help me figure out the real yardage. Stay tuned for that...
Materials
- Worsted weight yarn - or whatever yarn you like
- Size 5 dpns - or whatever size gives you a fabric you like
- Yardage — This will vary depending on the weight of yarn, but I used probably less than 30 yds of approximately worsted weight, 2-ply, handspun alpaca/wool blend.
Gauge
I didn't bother with a gauge swatch, since I was measuring my knitting as I went. In fact, you could use this project as a gauge swatch that actually does something functional at the end.
Preparation
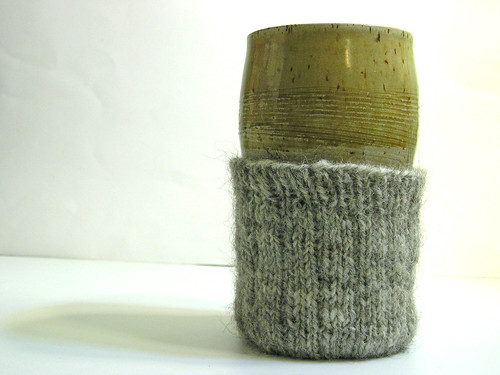
Measure the diameter of the bottom of your cup. Also measure how far up the cup you want your cozy to go (that is, take a height measurement). Follow the below instructions only as far as they apply to your desired measurements.
You might want to knit to a bottom cozy diameter that's slightly less than the diameter of the bottom of the cup, since the knitting will stretch, and it's better to have it be a bit too small than to have it be too big and fall off your cup, right?
Go forth and knit!
Cast on 4 sts. Divide over 3 or 4 dpns. Join in round without twisting cast-on.
Place a stitch marker to mark the beginning of the round, if you like. (I always cheat and use the yarn tail hanging out of the cast-on as my "marker." When the knitting gets longer and kind of "swallows" the yarn tail, you can pull the tail up between the last stitch of the round and the first stitch of the round, so that it sticks out of the knitting and you can check where the round starts.)
Increase in every stitch (kfb) for three rounds. (If you have trouble controlling the needles at this point — I know I did — you can lay the needles on a table and knit using the table for support until the needles stop flopping around so much.)
Knit 3 rnds plain (all knit stitches).
Inc rnd: Inc in every st.
Knit 2 rnds plain. (Designer's note: I stopped after these two rounds for a bottom diameter of 2.75 inches. Stop wherever you reach the desired diameter, as directed below.)
Knit inc rnd again. Knit 3 rnds plain.
Continue repeating the inc rnd and knitting plain in between each inc rnd, increasing the number of knit rnds after each inc rnd by 1, until you reach the desired size for the bottom of the cozy.
Then, count the number of stitches you have on your needles, and choose a rib pattern that will fit into the number of sts you have.
I ended up with 64 sts, so I could have chosen any rib pattern based on a multiple of 2 or a multiple of 4 sts, like 1x1 rib, 2x2 rib, 4x4 rib or 3x1 rib. I chose 3x1 (k3, p1, and repeat to end).
You can just start knitting away in your rib pattern, or you can work a "turning ridge" of purl stitches before starting the ribbing. I just went straight into the ribbing.
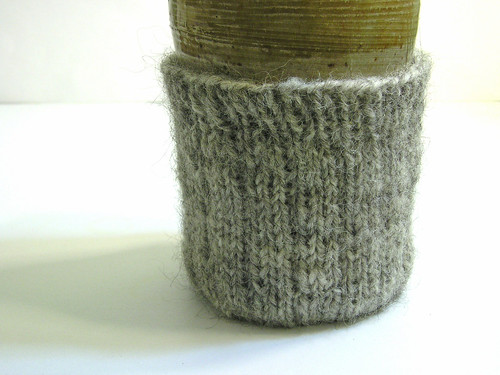
Knit in your ribbing pattern until you reach your desired cozy height. I knit for 3 inches, then knit another half-inch of 1x1 ribbing to create a tighter top edge, since the cup I was knitting for gets bigger as it gets taller. (You may want to try the cozy on your cup while knitting and adjust your target height as seems reasonable.)
Bind off using a stretchy cast-off. I bound off in pattern (k1, p1).
Weave in the yarn tails and enjoy your cup cozy. ;D You can embroider it, sew on it, and otherwise make it awesome, of course. And if you do, I'd love to see pics!
License/copyright: This pattern and items created from it are intended for personal, noncommercial use only. You're welcome to redistribute the pattern for noncommercial purposes as long as you leave the credits intact. :D If you're interested in using this pattern or the products of this pattern for commercial purposes, please contact the designer at crystal@starncrossbones.com.